You can now show the entire schedule of both current and future meetings across your resources on an external device thanks to the Room Booking System on displays functionality. Making that big TV in your office’s lobby even more useful!
Technical requirements
Room Booking System on displays can be used on any external display as long as it:
- Has stable internet connectivity
- Has Internet browsing capabilities (Smart TV or any streaming device that can make a TV “smart” such as an Airtame, Amazon Fire, Google Chromecast, etc.)
The size, resolution, ratio, and orientation of the device do not matter. Room Booking System on displays is fully responsive and will adapt to any screen setting.
How to connect your Room Booking System to a display
The process of connecting your Room Booking System to a display is very similar to pairing a 6-inch device or 13-inch device to your Room Booking System Web Portal account.
Here’s how to do it:
- Open a web browser on your display of choice and visit [SERVER_IP]display.
- You will be presented with a pairing PIN code
- Open your Room Booking System Web Portal on your computer and navigate to “Manage” -> “Devices”.
- Click “+ Add device”
- Select the "TV or browser" tab in the new pop-up window
- Enter the PIN that you see on your display and click “Pair device”
- You will be forwarded to the “Edit device” page for that display
- Enter the name for the device
- Select the room/resources which you wish to display on the device. You can select more than one resource
- Select the timezone in order to display the correct times
- Click “Save”
And that’s it! You have successfully connected your Room Booking System to your own device.
Room Booking System on displays functionalities

At the moment, Room Booking System on displays has only one functionality with two different modes - Room mode, Meetings mode, and Custom Content.
In order to select one of the two main modes of the Status board functionality, make sure you have the “Advanced mode” of the Room Booking System Web Portal enabled (located in the top-left corner of your Room Booking System Web Portal dashboard) and then navigate to the bottom of the Room Booking System on displays page where you will be faced with the following option to select the desired mode under the Functionality settings section.
In case “Meetings” is selected, you will be provided with two additional options, allowing you to further customize the Status board:
- Show vacancies - If enabled, vacant resources will be visible at the bottom of the Room Booking System on the displays interface
- Show only ongoing - If enabled, the Room Booking System on displays will display only currently ongoing meetings
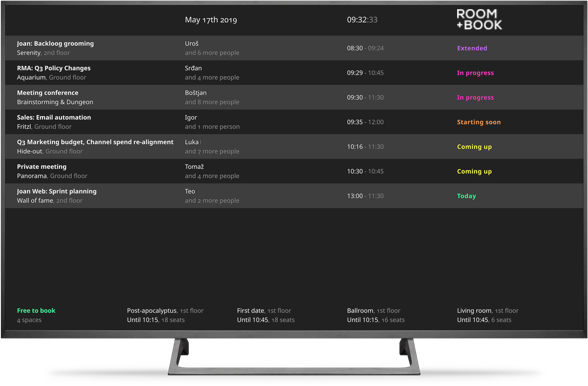
Meetings mode
The meetings mode provides you with a detailed overview of all resources and meeting schedules, both current and in the future.
It features the following information:
- Current date
- Current time
- List of current or upcoming meetings with 4 columns:
- Meeting subject/name and location
- Meeting organizer and number of confirmed attendees
- Start and end time of the meeting
- Day/Date of the meeting
- Available rooms and resources
- Name of the room/resource
- Availability period - for example, “All day”, “Until 14:00”
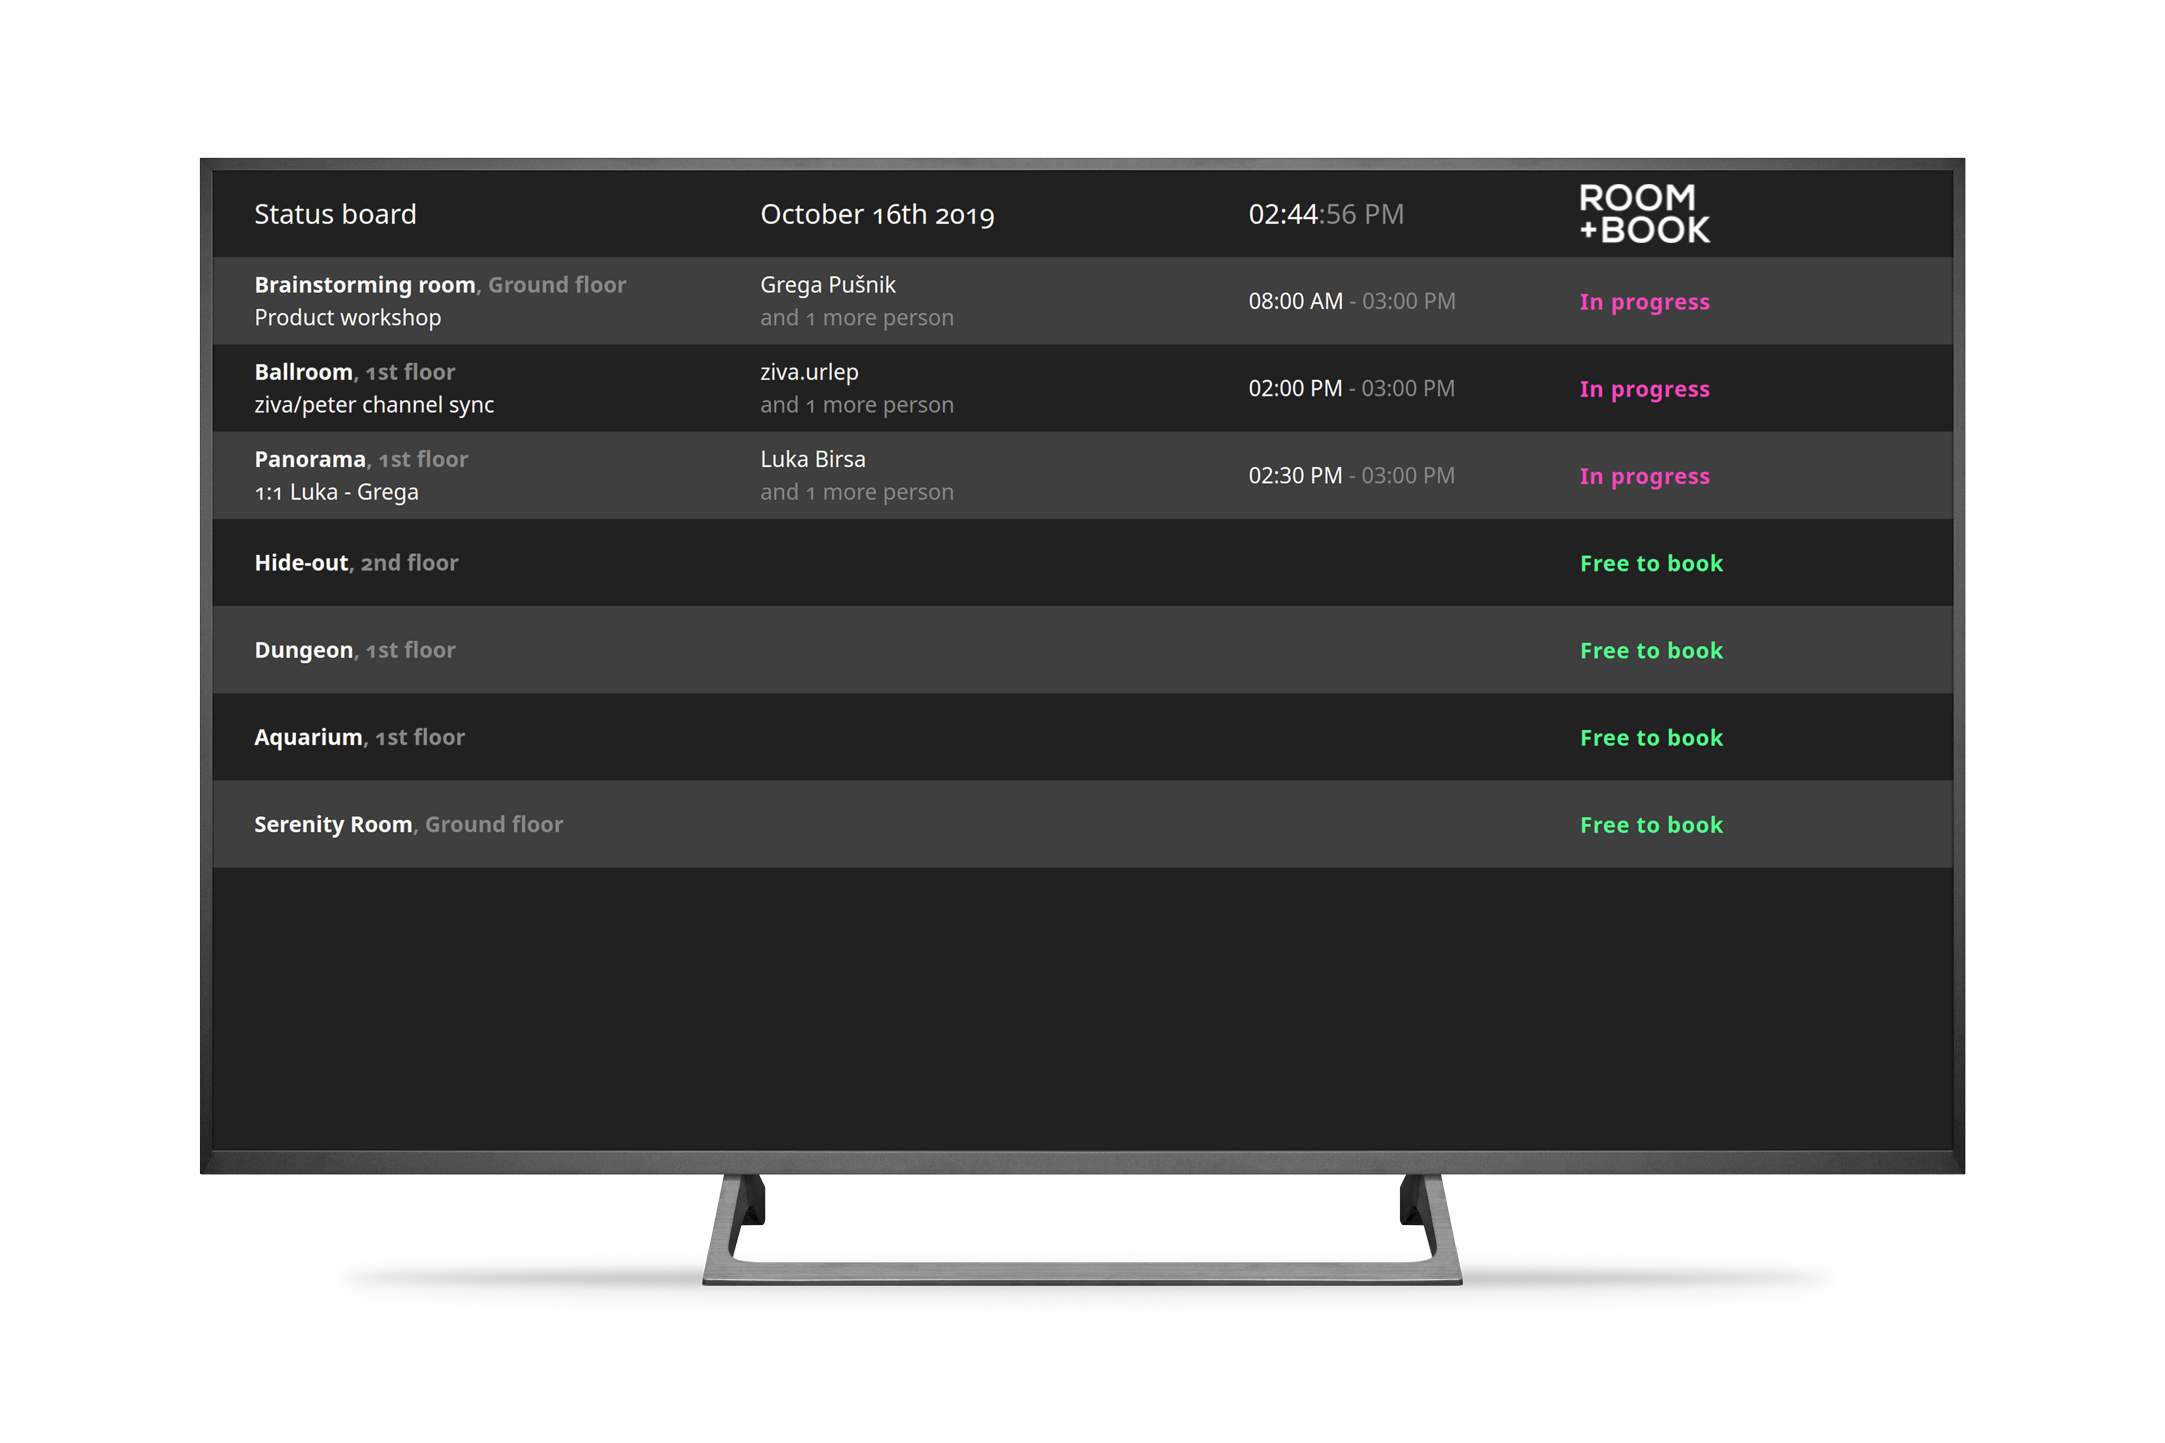
Rooms mode
The rooms mode displays all meeting rooms and their current and future status.
It features the following information:
- Current date
- Current time
- List of meeting rooms:
- Meeting subject/name and location
- Meeting organizer and number of confirmed attendees
- Start and end time of the meeting
- Day/date of the meeting
- Available rooms and resources
- Name of the room/resource
- Availability period - for example, “All day”, “Until 14:00”
Custom content
By setting up your Room Booking System on displays on your own TV, you are also able to utilize the Custom content feature and have it display your desired message or photo(s) instead of the default functionalities.
To learn more about how to set this up for your Room Booking System on display, click here.